Within the "Quality" section of the "Setup," you will see a window labeled "Quality Severity List," where you can create and modify quality levels used to rate work done on tasks and projects.
Should you want to add a new quality severity level to the list, click on the
 "Add New" icon located in the upper right-hand corner of the window.

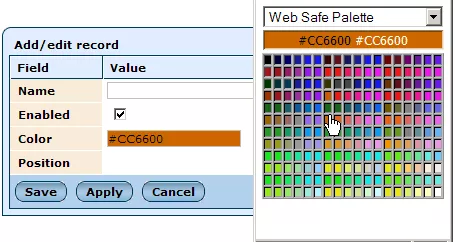
Within the window that appears (displayed below), enter a name for the new quality level, check the "Enabled" box if you would like the new level to be available right away and appear in the quality severity drop-down menu, and select a color with which you would like to highlight all tasks and projects which are assigned this quality severity level.
Once you are finished, click "Save" and the new quality severity level will be added to the system.

In addition to creating new quality severity levels, you can modify the details of existing levels by simply clicking on the desired level's name and altering the information as desired.
You can also change the order in which the levels are displayed within their drop-down menu by using the arrow icons in the "Position" column to move individual levels up or down within the list as desired.
Finally, should you wish to remove a quality severity level from the list entirely, simply click on the
 "Remove" icon within that level's row.