Call 1-888-670-1652
Spire CoreDB Connect Error (2002) Connection timed out
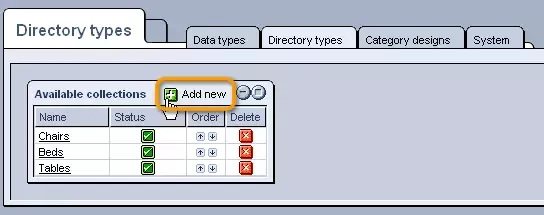
Directory TypesIn the "Directory Types" tab of the Directory module's "Setup" section, you can create new directories as well as view and manage all of the system's existing directories. Creating Directories:In order to create a new directory, simply click on the
In the "New Type" window that appears, simply enter a name and description for the directory, as well as select whether or not you would like the directory to currently be active. You can also select to hide the name column by checking the box at the bottom of the form. Once you are done, simply click "Save," and the new directory will be added to the "Available Collections" table. Modifying Directories:In order to modify the information specified upon the creation of a directory as well as assign fields and designs to the directory's categories and items, simply click on the desired directory's name within the "Available Collections" table.
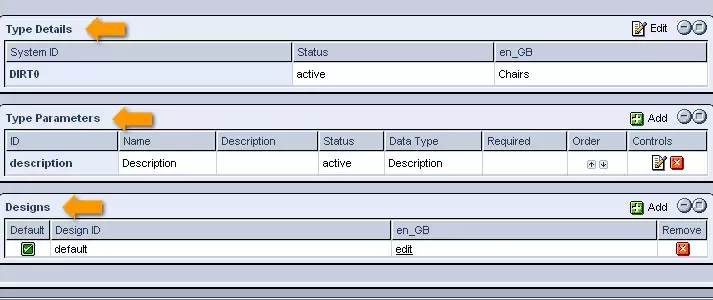
Once clicked, you will be presented with three tables: Type Details, Type Parameters, and Designs. Type Details:In order to modify the details of the directory specified upon its creation, click on the
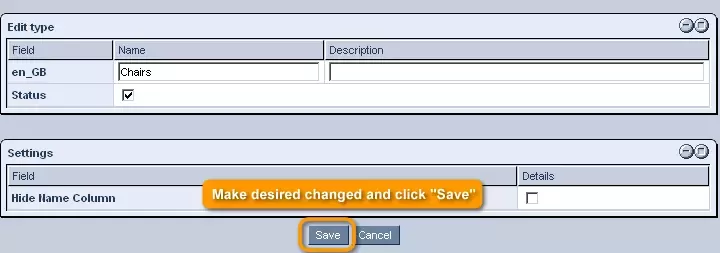
In the editing window that appears, simply make the desired changes and click "Save" in order to have them applied. Type Parameters:In order to determine what fields will be included in the creation form for items within the selected directory, you should access the "Type Parameters" table. In order to create a new field to be included in the forms, click on the
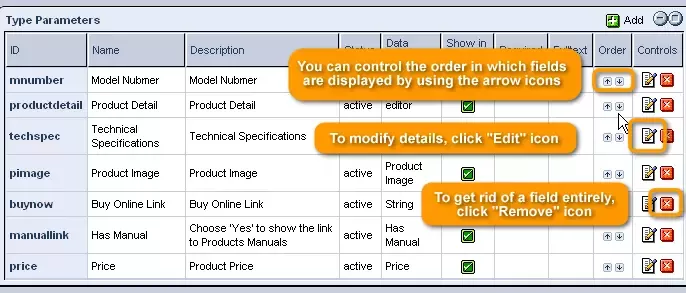
In the window that appears, you can assign a name to the field as well as a design ID to determine how it will be displayed. You can then determine the type of field you would like to create by selecting the desired data type from the provided drop-down menu, which will contain a list of all data types that you have created within the Setup's "Data Types" tab. You can also determine whether or not you would like the field to currently be active and whether or not it should be a required field in adding items to the directory by checking the appropriate boxes. Should you wish to assign a specific priority to the field or a custom height and width to override any default display settings, this can also be done. Finally, should you like the field to be displayed in the list of parameters for the directory, check the box at the bottom of the window before clicking "Save" to add the field to the list of parameters. Once added to the list of parameters, you can control the order in which fields are displayed by using the arrow icons in the "Order" column to move individual fields up or down within the list. Should you ever wish to modify the details of an existing field, this can be done as well, by clicking on the
And should you decide to get rid of a field entirely, this can be done by clicking on the
Designs:In order to add a design to be used in the directory's display, simply click on the
In the window that appears, you can enter the design ID of the desired category design, created within the Setup's "Category Designs" tab, as well as specify whether or not you would like the design to be the default design that will be used in displaying the categories and items unless otherwise specified. Once you are done, click "Save" and the design will be added to the "Designs" table.
Should you ever wish to edit the design's details (its ID and/or default status) simply click on the "edit" link in its row of the "Designs" table. And should you ever wish to remove a design entirely, so that it will no longer be used in the directory's display, simply click on the
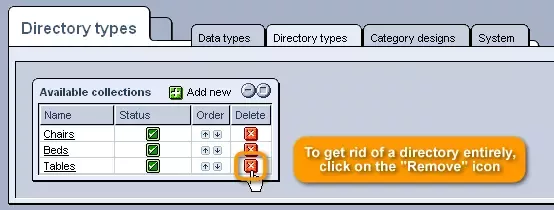
Deleting Directories:In case you decide to get rid of a directory entirely, all you need to do is click on the
|
Aspiresoft 2017 © All Rights Reserved. Privacy Policy

