Call 1-888-670-1652
Spire CoreDB Connect Error (2002) Connection timed out
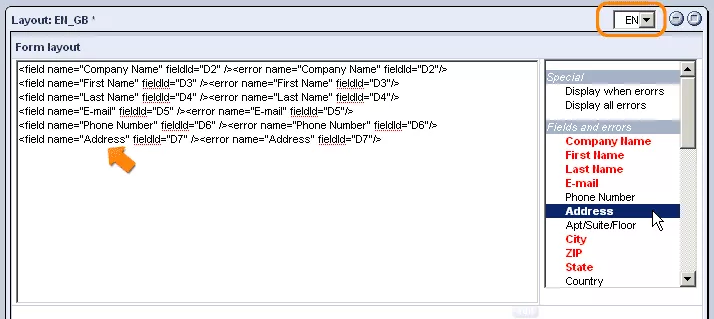
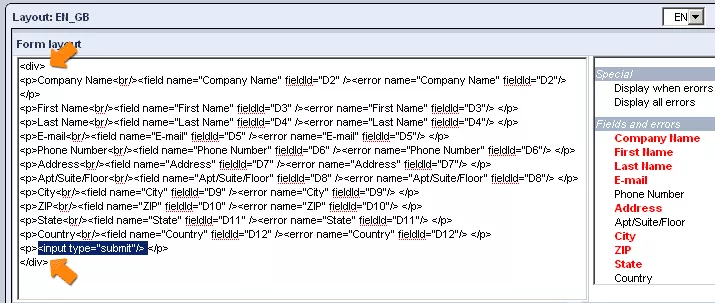
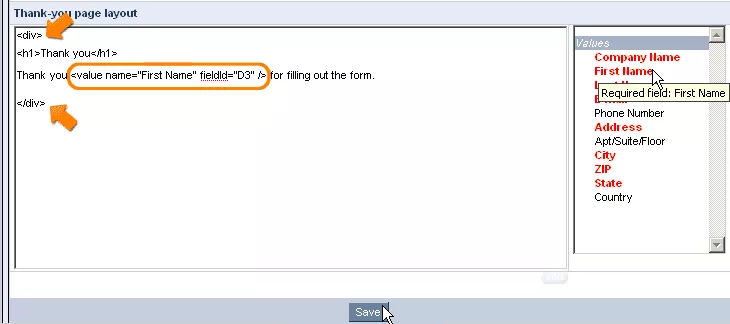
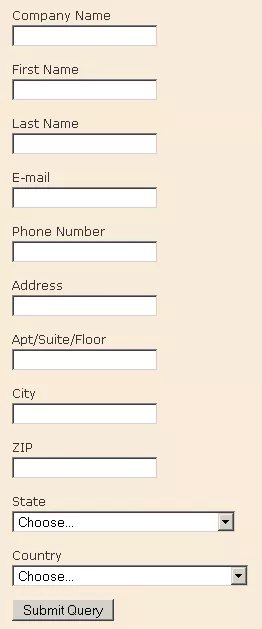
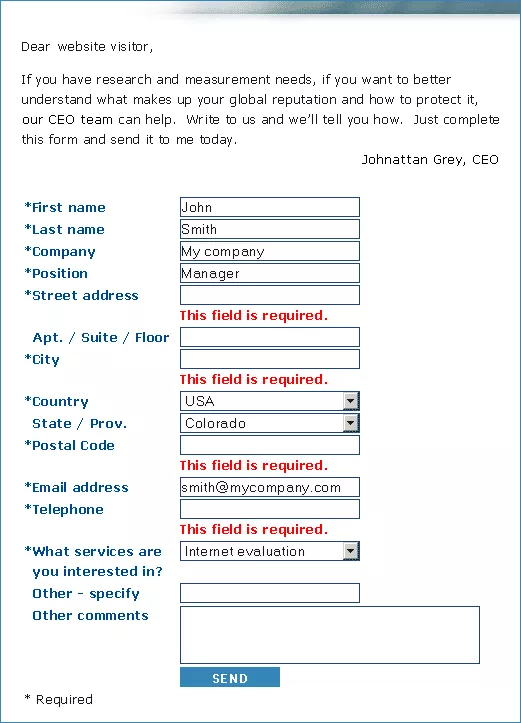
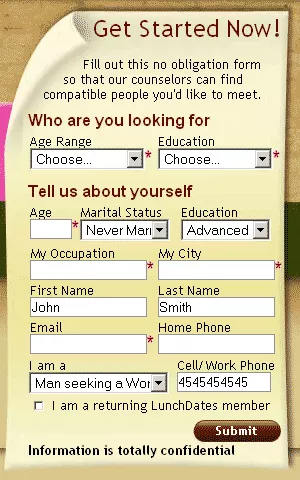
Custom Form LayoutIn case you would like to create your own designs for forms on you website, this can be done in the "Layout" tab as well. Form Layout:In order to begin, you should specify the language that you would like to work with (as different layouts can be created for each of the individual languages that your site supports), by selecting the desired option from the drop-down menu in the upper right-hand corner of the window. Once you have selected a language, you can begin entering HTML into the "Form Layout" window in order to determine its appearance. When filling out the "Form Layout" window, you should be sure to make use of the field and error shortcuts on the right-hand side of the screen, which, when clicked on, will insert content into the window corresponding to particular fields and error messages included in the form. For your convenience, whenever fields highlighted in red are added to the window, relevant error messages, which will be displayed whenever users fail to complete these fields correctly, will be added to the window as well. As a note, when creating the content of your form, you should be sure to close all fields with root tags (p, div, table). All XML documents must contain a single tag pair to define the root element, with all other elements nested within the root element. Specifically, each field that you would like to be displayed in the form should make use of a separate paragraph. For example, to "<field name="Company Name" fieldId="D2" /><error name="Company Name" fieldId="D2"/>," you should add "<p>Company Name<br/><field name="Company Name" fieldId="D2" /><errorname="Company Name" fieldId="D2"/></p>" (<p></p> is tag pair, defining a paragraph - the "br/" tag inserts a single line break). Once you have finished entering the main content of the form, be sure to add a tag that will create a "Submit" button at the bottom of the page (for example: <input type="submit"/>). "Thank You" Page Layout:After designing the layout of your form, you can also create a customized design for the "thank you" page, which will be displayed each time a user submits your form. In order to design the page, simply enter the desired HTML in the "Thank You Page" window, making use of the items in the right-hand "Values" menu, which act as variables that will automatically be filled in with the individual details of the user submitting the form. In creating the page, you should make sure to include a root tag (such as <div>, as displayed in the image below). Should you wish, you can also make a header for the page (such as <h1>Thank You</h1>, as in the image below). Once you are finished, just click "Save" at the bottom of the screen, and the settings will be applied to the system. Below is the graphical output of the form used as an example in the " Form Layout" section above: The above image is a very simple example of a form. There is always the possibility to insert more complicated HTML code using styled tables, *-signed required fields, an introductory paragraph at the top, and the like, in order to achieve a more appealing output, as in the form below: The HTML code behind the form above would look something like this: Here is another example of a custom designed form: |
Aspiresoft 2017 © All Rights Reserved. Privacy Policy
